Creating a website for free has never been easier, and in this guide, I’ll show you how to do it using WordPress with free hosting and a free domain. Whether you’re starting a blog, building a portfolio, or launching a small business site, this step-by-step tutorial will help you get online without spending a penny.
1. Why Build a Free Website with WordPress?
WordPress is a powerful content management system (CMS) that allows you to create and manage a website easily. With its user-friendly interface, you don’t need to be a tech expert to build a beautiful website.
The best part? You can do it all for free using free web hosting and a free domain. This tutorial will help you:

- Set up a WordPress website on a free domain.
- Install WordPress with just a few clicks.
- Customize your website with a free template.
- Edit the design using the Elementor plugin.
2. Step 1: Set Up Free Web Hosting and Domain
To get started, you need to sign up for free web hosting. Here’s how:
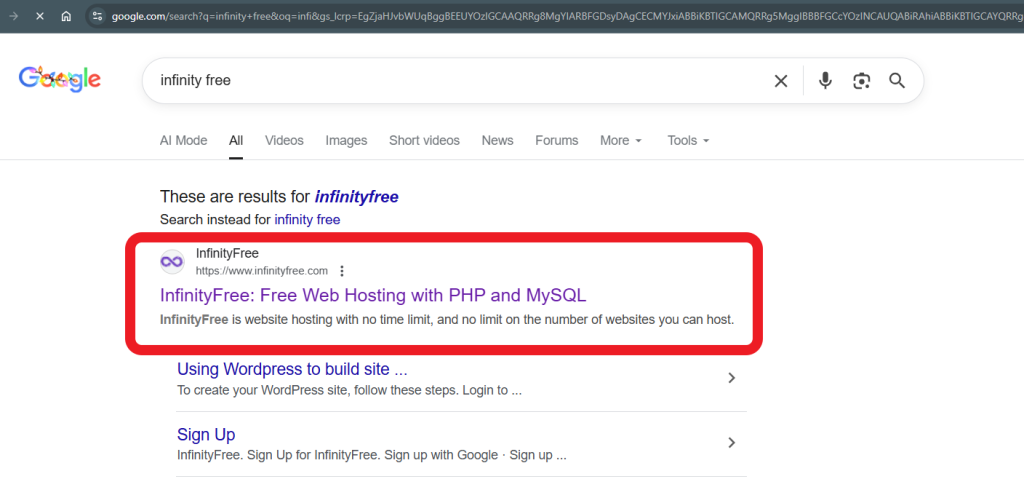
- Open your browser and search for Infinity Free.
- Go to the official website and click Register Now.
- Sign up using your Gmail or email address.
- After registering, go to your dashboard and click Create Account.
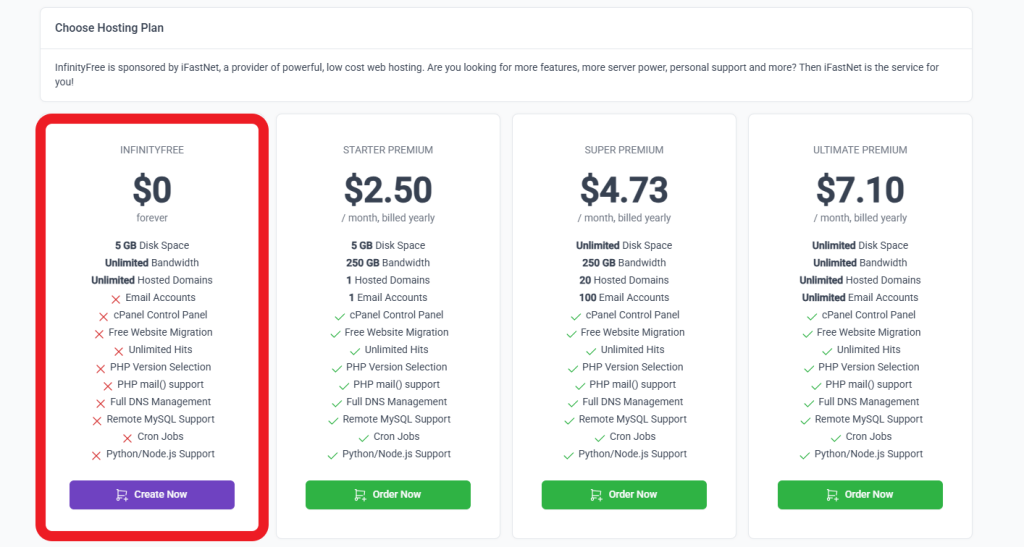
- Choose the free hosting plan and get a domain name like yourname.infinityfree.me.
Once your account is created, you’ll have access to free hosting and your custom domain.
3. Step 2: Install WordPress
Now it’s time to install WordPress:
- In your Infinity Free dashboard, click on Control Panel.
- Scroll down to Software and select Softaculous App Installer.
- Click on WordPress.
- Choose your new domain (e.g., yourname.infinityfree.me).
- Enter your website name, description, and admin login details.
- Hit Install and wait for the process to complete.
Now your WordPress website is live!
4. Step 3: Clean Your WordPress Dashboard
To make it easier to navigate, clean up your dashboard:
- Log in to your WordPress admin panel.
- Go to Screen Options (top right) and uncheck the unnecessary options.
- Now you have a clean dashboard to work with.
5. Step 4: Download and Upload a Free Template
To make your website look professional quickly, use a free template:
- Go to Masha Digital Resources and download the free website template.
- Check your email for the download link.
- Save the template to your computer.
6. Step 5: Install the Plugin to Upload Your Template
To upload your template, you’ll need a plugin:
- In your WordPress dashboard, go to Plugins → Add New.
- Search for All-in-One WP Migration.
- Install and activate the plugin.
- If the template file is too large (over 20MB), you’ll need the Pro version (available upon request).
Once the plugin is installed, go to All-in-One WP Migration → Import, and upload the template file.
7. Step 6: Update Login Credentials
After importing the template, WordPress might overwrite your login credentials. Here’s what you need to do:
- Log in using the provided credentials.
- Go to Users → Add New to create a new admin user with your own login details.
- Delete the old user but assign the content to your new admin account.
8. Step 7: Customize Your Website
It’s time to personalize your website:
Change Logo:
- In WordPress, go to Edit with Elementor.
- Click on the logo and choose Change Site Logo.
- Upload your custom logo.
Update Site Colors:
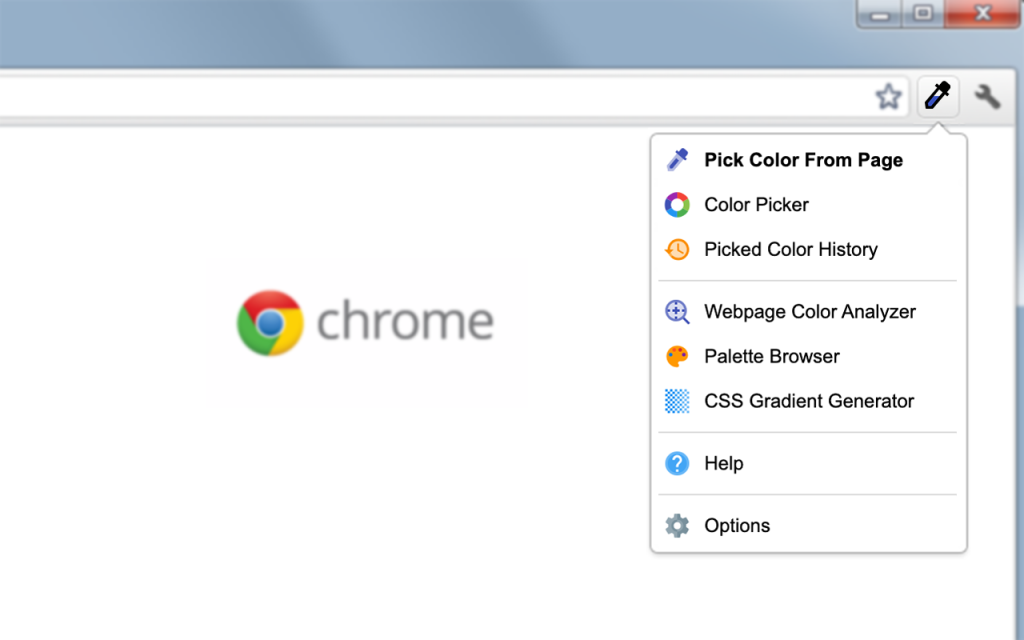
- Install a color picker like ColorZilla.
- Pick colors from your logo and update your website’s theme.
Edit Footer & Header:
- Go to Edit with Elementor and update your footer and header.
- Replace any placeholder text, phone numbers, and logos.
9. Step 8: Add Content
Add relevant sections to your website:
Hero Section:
- Change the main heading and description.
- Upload a background image.
Services Section:
- Replace the default service titles and descriptions.
- Upload images for each service.
Why Choose Us Section:

- Replace the text with your unique value propositions.
10. Step 9: Create a Contact Page
- Go to Pages → Add New, and name it Contact Us.
- Edit the page with Elementor and add a contact form.
- Set up the form to collect name, email, phone number, and message.
11. Final Touches
- Save your changes and publish the website.
- Preview the site to make sure everything looks good.
- Make any final adjustments to the content and design.
Conclusion
And there you have it — your very own free website using WordPress with free hosting and a free domain! You now have a fully functional website that you can customize and share with the world. If you want to upgrade to a custom domain, just leave a comment below and I’ll guide you through the process.